VSCode is my favorite IDE for writing in most languages. It runs fast, it has a fantastic community, and its command palette (Cmd+Shift+P or Ctrl+Shift+P FTW 🎉) makes me more productive without switching context or touching the mouse.
Thanks to Phil Nash's VS Code extension, I can use VSCode to launch and manage my ngrok tunnels straight from the command palette!
In this post, I will show you how to set up the extension and use it to manage ngrok. If you want to do the same, grab your VSCode and follow along.
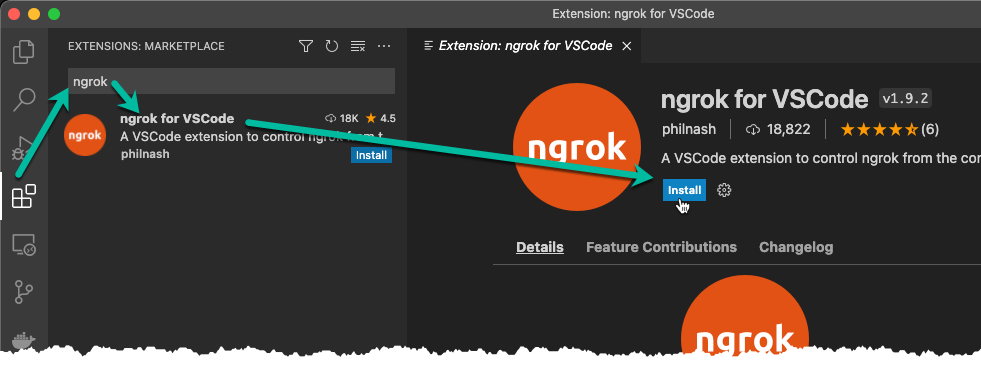
Installing the extension
Installation is easy. Just head over to VSCode, click the extensions tab, search for ngrok, and install Phil's extension (the first from the search results):
The extension installs the ngrok agent and sets up VSCode behind the scenes without even asking you to restart the IDE (this is high quality! Did I say thank you again, Phil?)
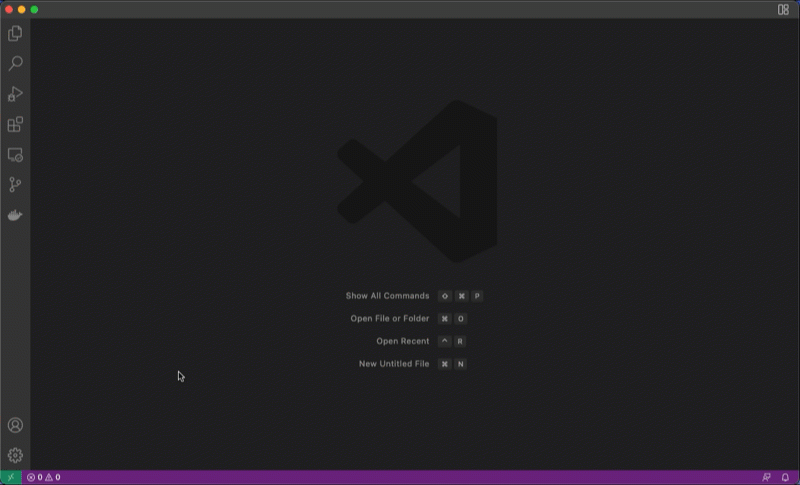
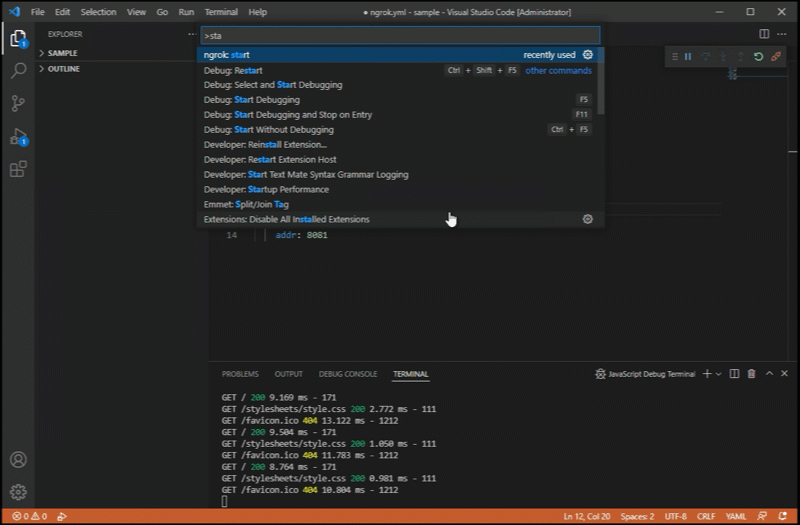
After the installation is done, you can confirm it's ready by launching your command palette (Cmd+Shift+P / Ctrl+Shift+P) and typing ngrok. You should see a list of capabilities and options you can do from within VSCode ❤️
With the extension installed, let's get our app to the world.
(Optional) Creating a Sample App
For this tutorial, I will use a sample express-js app to test the extension. I created this app from scratch so you can see how the tutorial would apply to any app (regardless of framework or programming language). If you want to use the same sample app, follow the steps below. Otherwise, skip to the next section:
Note: To execute these steps, you need Node JS installed in your computer
- To install the sample app, run the express-generator and install the npm packages in your terminal:
npx express-generator sample-app
cd sample-app
npm install-
Enter
code .to open the sample app in vscode. -
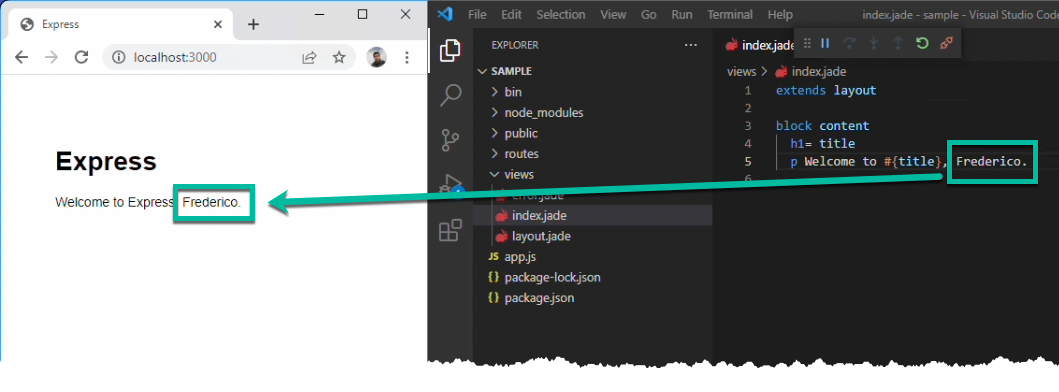
In VSCode, open the file
package.jsonand click Debug. The app will be launched inhttp://localhost:3000 -
Open your browser and confirm the app is running.
-
Now you can change the file
views/index.jadeand refresh your browser to see the changes.
Launching your first tunnel
- Back to vscode, launch the command palette (Cmd+Shift+P or Ctrl+Shift+P) and enter
ngrok start

-
Enter the port where your app is running locally (in my sample app, 3000)
-
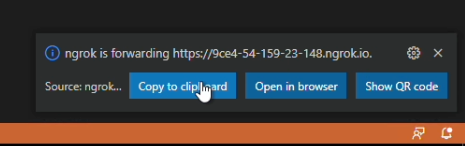
The extension will launch ngrok and return a url.
-
On the bottom right, click the button to copy the url.
- In your browser, paste the url. If it's your first time using ngrok, you will be prompted to sign up for a free account.
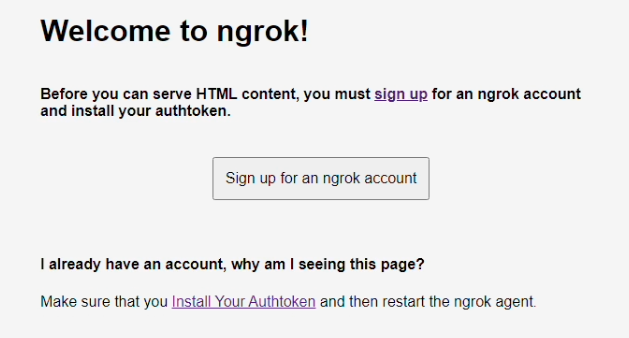
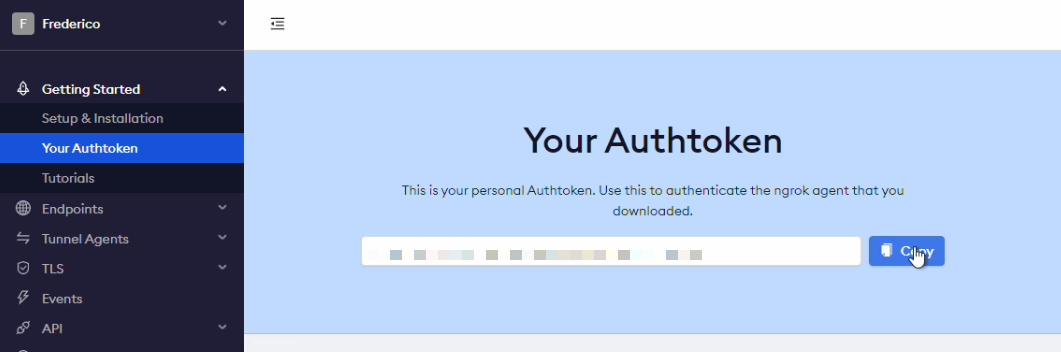
- Follow the steps until you get to the home page. Click Your Authtoken and click Copy.
-
Back to vscode, launch the command palette and enter
ngrok edit settings. Enterauthtoken: <your_auth_token>and save the file -
In the control palette, enter
ngrok stopand then select All. -
Launch the palette one last time, enter
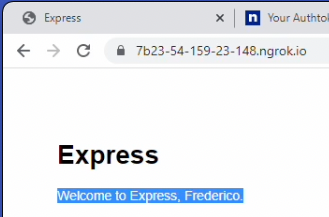
ngrok start, the port where your service is running (in my example 3000), and copy the generated url. Your app is out to the world:
Extra notes and tricks
To wrap this up, here are some final tricks to help you:
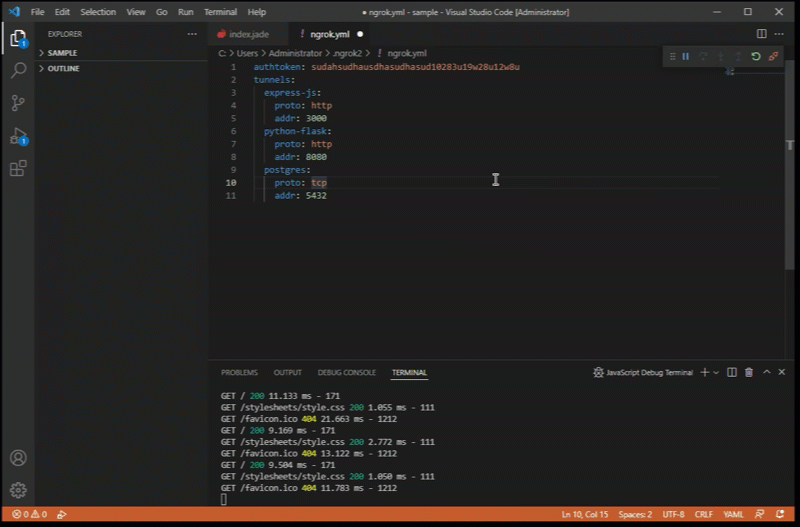
Tip 1: You can expand the ngrok config file with pre-defined settings. Having pre-defined settings per type of app saves me time remembering ports:
Tip 2: You can use the QR code to quickly launch your app from a mobile device
And finally, thanks
A huge shout out to Microsoft for making VSCode a great IDE and Phil for building this extension. You can find more on how he did it here.