Mar 6, 2024
React CRUD: An Introductory Guide
•
2,515 words
•Mar 6, 2024
2,515 words
•CRUD is a mechanism that allows modern web applications to manage large datasets effectively. Despite sounding like a word, CRUD is not an English word but an acronym for Create, Read, Update, and Delete. These operations allow users to manipulate and interact with data from the application. In this post, you’ll learn about CRUD and all its operations, why people prefer it, and how to set up the React CRUD environment.
As mentioned, CRUD stands for Create, Read, Update, and Delete. A React CRUD application allows users to create data, read data based on search queries, easily modify data through the update operation, and delete the data when not needed.
React is a popular JavaScript library for building reusable and clean user interfaces following a declarative programming style. The composable nature of React makes it easy to break down complex components into a smaller group of components for building fast and reusable components.
As stated above, the operations of a CRUD application are the Create, Read, Update, and Delete operations. Let’s dive into the details of all the operations.
CRUD apps are made up of the following parts:
The user interface (UI), also known as the front-end part of the application, is where the users interact with applications.
The application programming interface (API) serves as the link between the front end and the database.
Lastly, there is the database that stores information.
Like everything else, you need a solid understanding of the basics before building. It is the knowledge of those basics that will aid your building. To get started with building a React CRUD application, knowledge of the following is a must:
Next, let’s look at how to set up a CRUD environment with a simple shopping list application.
A new React application is needed for the user interface of our shopping list application. Creating a new React application with create-react-app is straightforward. Run the following command in your terminal:
npx create-react-app shoppingAfter creating a new React application, run this command to take you to the folder:
cd shoppingTo get the application up and running, run the following command:
npm startInside the src folder, create a components folder. Then, create the following four components inside the components folder:
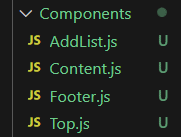
Then create a data folder that will house our database file.
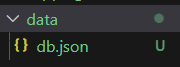
Your file structure should look like this afterward.
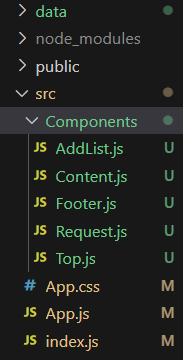
The components folder houses the AddList.js, Content.js, Footer.js, and Top.js components. App.css is the CSS file for the application; index.js will render the App.js file. The data folder is the parent to the database file, and App.js will render all the application components.
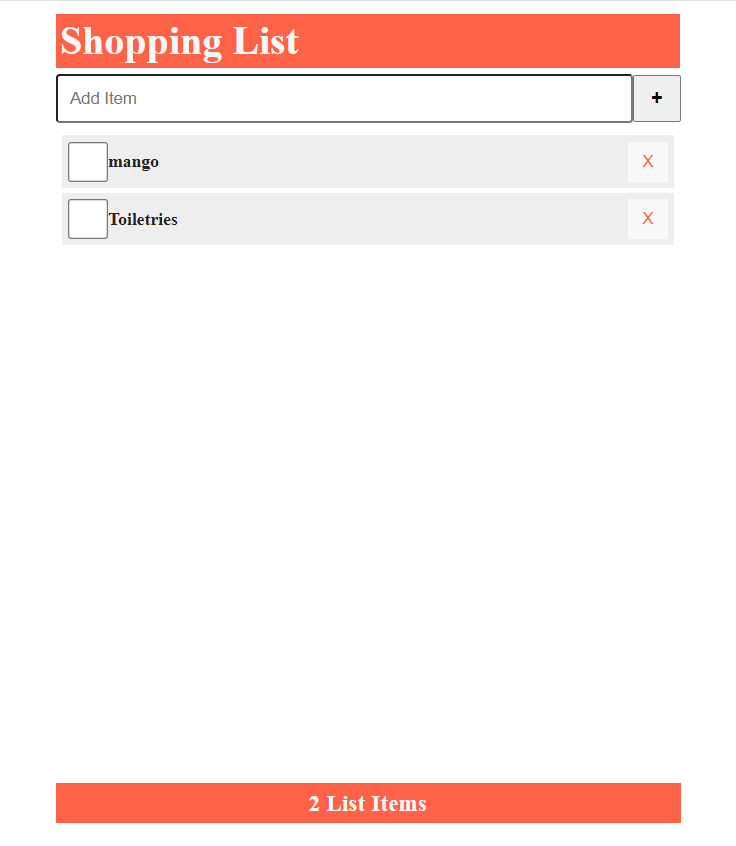
The image below shows the application we will be building during this article.
This is the header component of the shopping list CRUD app.
1const Top = () => {2 return (3 <header className="header">4 <h1>Shopping List</h1>5 </header>6 );7};8 9export default Top;In the above code, the Top component was created, and an H1 with a shopping list was returned.

This is the AddList component, which is responsible for adding a new shopping list item to the application.
1import { useRef } from "react";2 3const AddList = ({ newItem, setNewItem, handleSubmit }) => {4 const inputRef = useRef();5 6 return (7 <form8 className="addForm"9 onSubmit={handleSubmit}10 >11 <label htmlFor="addItem">Add Item</label>12 13 <input14 type="text"15 id="addItem"16 autoFocus17 ref={inputRef}18 placeholder="Add Item"19 required20 value={newItem}21 onChange={(e) => setNewItem(e.target.value)}22 />23 24 <button25 type="submit"26 aria-label="Add Item"27 onClick={() => inputRef.current.focus()}28 >29 <h3>+</h3>30 </button>31 </form>32 );33};34 35export default AddList;This component’s main function is for the user to input their shopping list items into the application through an HTML input element. It receives props, also known as property, from the App.js file.

This is the component responsible for displaying the list of shopping items.
1const Content = ({ list, handleCheck, handleDelete }) => {2 return (3 <main className="content">4 {list.length ? (5 <ul>6 {list.map((item) => {7 return (8 <li9 className="list"10 key={item.id}11 >12 <input13 onChange={() => handleCheck(item.id)}14 type="checkbox"15 checked={item.checked}16 />17 18 <label onDoubleClick={() => handleCheck(item.id)}>19 <h3>{item.item}</h3>20 </label>21 22 <button onClick={() => handleDelete(item.id)}>X</button>23 </li>24 );25 })}26 </ul>27 ) : (28 <h329 style={{30 marginTop: "2rem",31 }}32 >33 {" "}34 Empty List{" "}35 </h3>36 )}37 </main>38 );39};40 41export default Content;The component receives props from the App.js file.
This is the footer component of the shopping list application.
1const Footer = ({ list }) => {2 return (3 <footer className="footer">4 <h3>5 {list.length} List {list.length === 1 ? "Item" : "Items"}{" "}6 </h3>7 </footer>8 );9};10 11export default Footer;Just like the other component, the footer receives props from the App.js file.

To continue with our application, we need a back-end API. Creating a back-end API is a strenuous exercise for a simple data-retrieving service, hence the need to use a JSON Server.
JSON Server, a lightweight Node.js tool, simplifies creating a back-end API. Front-end developers create an API and get an HTTP server with a ready-made database. Installing the server with the following command-line prompt gives access to the popular HTTP methods like the GET, PATCH, POST, and DELETE methods.
npm install -g json-serverThe JSON Server treats a JSON file as a database. In this tutorial, our JSON file is db.json.
1{2 "items": [3 {4 "id": 1,5 "checked": false,6 "item": "Biscuit"7 },8 {9 "id": 2,10 "checked": false,11 "item": "Toiletries"12 },13 {14 "id": 3,15 "checked": false,16 "item": "Milk"17 }18 ]19}To start the server after installation, run the following command-line prompt:
npx json-server -p 3500 -w data/db.jsonAfter running the prompt, our new API endpoint is http://localhost:3500/items.
After creating our API endpoint for this application, the next step is to perform the Create, Read, Update, and Delete operations.
1import "./App.css";2import Content from "./Components/Content";3import Footer from "./Components/Footer";4import Top from "./Components/Top";5import AddList from "./Components/AddList";6import request from "./Components/Request";7import { useState, useEffect } from "react";8 9function App() {10 const API_url = "http://localhost:3500/items";11 12 const [list, setList] = useState([]);13 14 const [newItem, setNewItem] = useState("");15 16 const [error, setError] = useState(null);17 18 useEffect(() => {19 const fetchData = async () => {20 try {21 const response = await fetch(API_url);22 23 if (!response.ok) throw Error("Error Message");24 25 const listItem = await response.json();26 27 setList(listItem);28 29 setError(null);30 } catch (error) {}31 };32 33 fetchData();34 }, []);35 36 // Add new Item to the list37 38 const addItems = async (item) => {39 const id = list.length ? list[list.length - 1].id + 1 : 1;40 41 const theNewItem = {42 id,43 44 checked: false,45 46 item,47 };48 49 const listItem = [...list, theNewItem];50 51 setList(listItem);52 53 const postOptions = {54 method: "POST",55 56 headers: {57 "content-Type": "application/json",58 },59 60 body: JSON.stringify(theNewItem),61 };62 63 const result = await request(API_url, postOptions);64 if (result) setError(result);65 };66 67 // Create a function to update the checked property68 69 const handleCheck = async (id) => {70 const listItem = list.map((item) =>71 item.id === id72 ? {73 ...item,74 75 checked: !item.checked,76 }77 : item,78 );79 80 setList(listItem);81 82 const myitem = listItem.filter((list) => list.id === id);83 84 const updateOptions = {85 method: "PATCH",86 87 headers: {88 "content-Type": "application/json",89 },90 91 body: JSON.stringify({92 checked: myitem[0].checked,93 }),94 };95 96 const reqUrl = `${API_url}/${id}`;97 98 const result = await request(reqUrl, updateOptions);99 100 if (result) setError(result);101 };102 103 // create a function to delete an item104 105 const handleDelete = async (id) => {106 const listItem = list.filter((item) => item.id !== id);107 108 setList(listItem);109 110 const deleteOptions = {111 method: "DELETE",112 };113 114 const reqUrl = `${API_url}/${id}`;115 116 const result = await request(reqUrl, deleteOptions);117 118 if (result) setError(result);119 };120 121 // create a function to prevent default submit action122 123 const handleSubmit = (e) => {124 e.preventDefault();125 126 addItems(newItem);127 128 setNewItem("");129 };130 131 return (132 <div className="App">133 <Top />134 135 <AddList136 newItem={newItem}137 setNewItem={setNewItem}138 handleSubmit={handleSubmit}139 />140 141 <Content142 list={list}143 handleCheck={handleCheck}144 handleDelete={handleDelete}145 />146 147 <Footer list={list} />148 </div>149 );150}151 152export default App;The above component houses all other components and, hence, passes props down to a few of them.
Let’s analyze the code in the above component.
Firstly, you will need to import all the components and the useState and useEffect hooks from React.
The useState and useEffect hooks are used to manage state and perform side effects in a React application, respectively.
Inside the function App, our API is stored in an API-url constant.
The fetch API is used to make GET requests because, in the HTTP world, read is also known as GET. The below code shows the read operation of the shopping list application.
1useEffect(() => {2 const fetchData = async () => {3 try {4 const response = await fetch(API_url);5 6 if (!response.ok) throw Error("Error Message");7 8 const listItem = await response.json();9 10 setList(listItem);11 12 setError(null);13 } catch (error) {}14 };15 16 fetchData();17}, []);The useEffect hook was used for side effects, i.e., something that React doesn’t have power over, in this case fetching data.
You might be wondering why Read came before Create. It’s because the Read operation, which is popularly known as retrieve, is the first step in the process. The users want to see the content before making any changes to the application. In a CRUD application, this involves fetching data from an API and displaying it for users. Recall that we have a component named AddList.js. This component renders a controlled form element. In this component, we can add new shopping items to the application.
1// Add new Item to the list2 3const addItems = async (item) => {4 const id = list.length ? list[list.length - 1].id + 1 : 1;5 6 const theNewItem = {7 id,8 9 checked: false,10 11 item,12 };13 14 const listItem = [...list, theNewItem];15 16 setList(listItem);17 18 const postOptions = {19 method: "POST",20 21 headers: {22 "content-Type": "application/json",23 },24 25 body: JSON.stringify(theNewItem),26 };27 28 const result = await request(API_url, postOptions);29 if (result) setError(result);30};To create a new Item, a function called addItems was created. Inside the function, there’s a need to generate a unique identifier (ID) for the shopping list item.
To do that, we checked if there were any items in the database. If an item is there, we add 1 to the unique identifier; if not, we start from 1.
The new item was created with an object that comprises the ID, input with type of checkbox, and the item.
The db.json file will get updated after adding a new shopping list to the application. See below for clarity.
1{2 "items": [3 {4 "id": 1,5 "checked": false,6 "item": "Biscuit"7 },8 {9 "id": 2,10 "checked": false,11 "item": "Toiletries"12 },13 {14 "id": 3,15 "checked": false,16 "item": "Milk"17 },18 {19 "id": 4,20 "checked": false,21 "item": "Sugar"22 },23 {24 "id": 5,25 "checked": false,26 "item": "Kitchen utensils"27 }28 ]29}The PATCH method is used for the update operation in this application. The item to be updated is the input with the type of checkbox.
1// Create a function to update the checked property2 3const handleCheck = async (id) => {4 const listItem = list.map((item) =>5 item.id === id6 ? {7 ...item,8 9 checked: !item.checked,10 }11 : item,12 );13 14 setList(listItem);15 16 const myitem = listItem.filter((list) => list.id === id);17 18 const updateOptions = {19 method: "PATCH",20 21 headers: {22 "content-Type": "application/json",23 },24 25 body: JSON.stringify({26 checked: myitem[0].checked,27 }),28 };29 30 const reqUrl = `${API_url}/${id}`;31 32 const result = await request(reqUrl, updateOptions);33 34 if (result) setError(result);35};The update method is quite different from the GET and POST methods. In this method, we need both the API-url and the ID of the particular shopping list item.
The DELETE method is used to delete an item.
1// create a function to delete an item2 3const handleDelete = async (id) => {4 const listItem = list.filter((item) => item.id !== id);5 6 setList(listItem);7 8 const deleteOptions = {9 method: "DELETE",10 };11 12 const reqUrl = `${API_url}/${id}`;13 14 const result = await request(reqUrl, deleteOptions);15 16 if (result) setError(result);17};Some of the best practices for using the CRUD operation are as follows:
Here are some of the reasons why CRUD is preferred by a lot of users:
Relatable: The CRUD application is relatable to a lot of users because it mimics the common interactions with databases.
Simple: It is a straightforward and easy-to-understand application.
Easily scalable: The CRUD application provides a solid foundation for scaling in the future.
Efficient: The CRUD application streamlines the data management process by providing an easy interface for creating, reading, updating, and deleting records.
With this detailed guide, you now have a clearer understanding of the mechanism of CRUD to build modern web applications. We discussed CRUD and all its operations, why people prefer it, and how to set up the CRUD environment.
Ready to move into production? Explore how you can use ngrok to test your CRUD app and layer in secure ingress with our JavaScript SDK in these additional resources:
You can sign up today and get started. Don’t hesitate to reach out if you have any questions or encounter any issues. Connect with us on Twitter or contact us at support@ngrok.com.